
Creating a Montessori-inspired home environment is one of the most rewarding ways to nurture your child’s independence and confidence.
One simple yet powerful activity to start with is setting up a Montessori water pouring station.
This hands-on station not only helps children refine their motor skills but also builds concentration, coordination, and responsibility.
It’s a small setup that can make a big difference in how children engage with everyday tasks — and it can easily be incorporated into your home using safe, functional, and beautifully designed materials.
At Dannico Woodworks, we believe in designing furniture and learning tools that encourage independence while maintaining the charm and safety every parent values.
If you’ve been looking for a simple, meaningful activity to introduce Montessori principles at home, this guide will show you exactly how to create a beautiful and practical water pouring station.
Benefits of a Montessori Water Pouring Station
Before we dive into the setup, it's essential to understand why a water pouring station is beneficial for children:
Enhances Fine Motor Skills
Pouring water from one container to another requires precise hand movements and control. This activity strengthens the small muscles in the hands and fingers, which are crucial for writing and other fine motor tasks.
Promotes Concentration and Focus
Pouring activities demand attention and careful observation to avoid spills. Children learn to focus on the task at hand, improving their ability to concentrate on other activities as well.
Encourages Independence
Children love to do things by themselves, and a water pouring station gives them the chance to practice self-sufficiency. As they successfully pour water without spilling, they gain confidence in their abilities.
Provides Sensory Experience
Water play is a fantastic sensory activity, offering children a chance to explore the texture, temperature, and movement of water. This sensory engagement is calming and enjoyable for many kids.
Essential Components of a Water Pouring Station
1. Child-Sized Table
A low, sturdy table is essential for a water pouring station. It should be at a height that allows children to comfortably reach the materials and work independently. Ensure the table is stable to prevent tipping or wobbling.
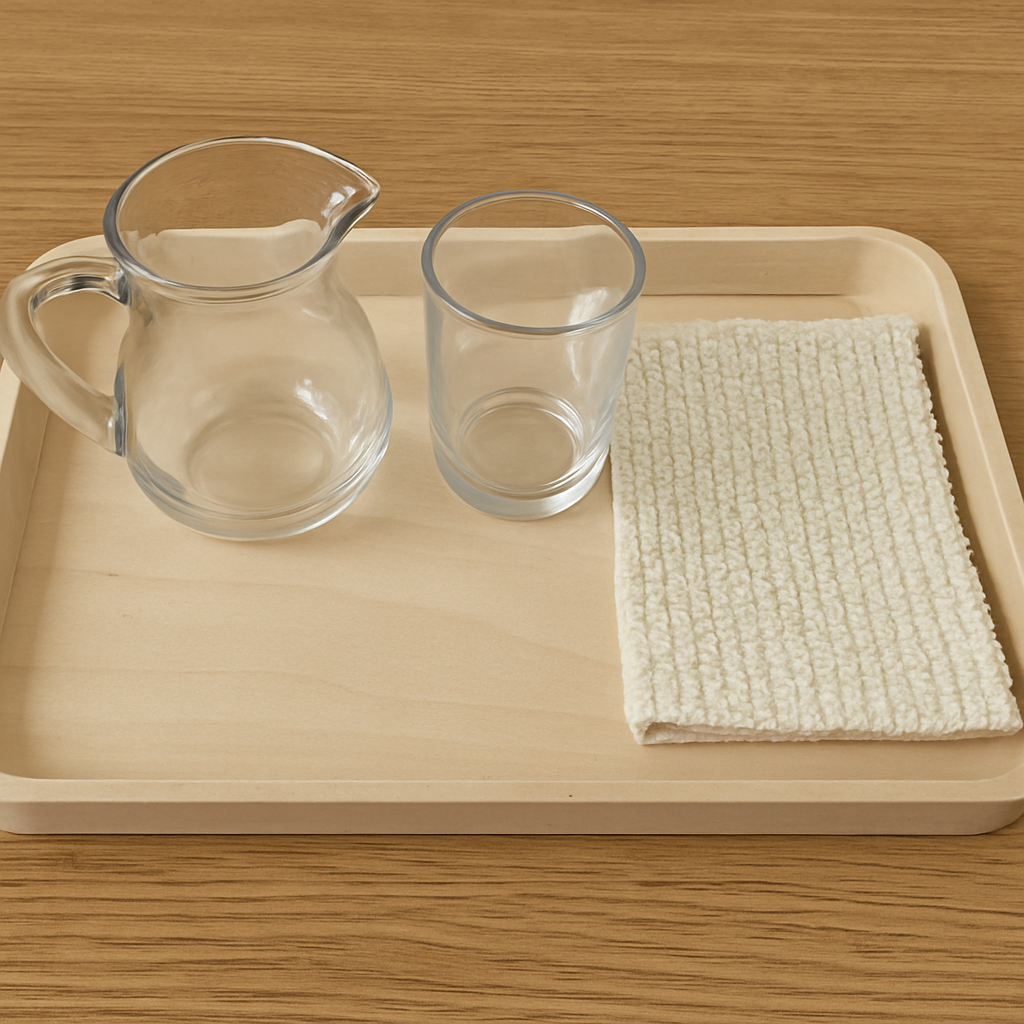
2. Water Pitchers
Choose two small pitchers that are easy for little hands to grip. One pitcher will hold the water, while the other will be used to catch the poured water. Clear pitchers are ideal, as they allow children to see the water level and improve their accuracy.
3. Trays or Containers
Place a tray or shallow container beneath the pitchers to catch any spills. This helps keep the area tidy and teaches children to manage any messes independently.
4. Towels or Sponges
Provide small towels or sponges for children to clean up spills. This teaches responsibility and helps children understand that spills are a natural part of the learning process.
5. Optional: Food Coloring
Adding a drop of food coloring to the water can make the activity more engaging by providing a visual element. However, this is entirely optional and should be used with consideration for any potential messes.
Setting Up the Station
Now that you have all the necessary components, it's time to set up your Montessori water pouring station. Follow these steps:
Step 1: Choose a Location
Find a spot in your home or classroom that is easily accessible to children but away from high-traffic areas. The space should have a hard floor, such as tile or hardwood, for easy cleanup.
Step 2: Arrange the Table and Materials
Place the child-sized table in the chosen location. Position the pitchers on the tray or shallow container, ensuring they are within easy reach for children. Lay out towels or sponges nearby for quick access.
Step 3: Introduce the Activity
Invite the child to explore the water pouring station. Demonstrate how to pour water from one pitcher to the other, emphasizing the importance of pouring slowly and carefully. Encourage the child to try it themselves, providing guidance as needed.
Step 4: Encourage Cleanup
Teach the child to use the towels or sponges to clean up any spills. This reinforces the idea that mistakes are part of learning and encourages responsibility.
Tips for Success
To ensure your Montessori water pouring station is a hit, keep these tips in mind:
- Start Simple: Begin with a small amount of water in the pitcher and gradually increase the volume as the child becomes more confident.
- Model Patience: Be patient and allow the child to explore at their own pace. Avoid rushing or taking over the activity.
- Celebrate Achievements: Acknowledge the child's progress and successes, no matter how small. Positive reinforcement boosts confidence and motivation.
Expanding the Activity
Once the child has mastered basic water pouring, you can expand the activity to include other practical life skills:
Transferring with a Ladle
Introduce a ladle to transfer water from one container to another. This activity further develops coordination and control.
Using Funnels
Provide funnels of various sizes for the child to experiment with directing water flow. This adds an element of problem-solving and exploration.
Mixing Colors
Offer two pitchers of different colored water and invite the child to mix them. This introduces basic color theory and adds a creative twist to the activity.
Montessori and Dannico Woodworks: A Perfect Pair
At Dannico Woodworks, we understand that furniture is more than just function — it’s part of a child’s world of discovery. Each of our designs is crafted with care to encourage independence, safety, and creativity.
From our Montessori Bookshelf Collection to our learning towers and play tables, every piece is built to empower your child’s natural growth while fitting beautifully into your home.
A Montessori water pouring station is a simple yet profound way to introduce your child to a world where learning feels natural and joyful — and the right furniture can make all the difference.
FAQs
What age is best for introducing a water pouring activity?
Children as young as 18 months can begin, provided the materials are safe and appropriately sized.
How often should I refresh the activity?
It’s best to rotate or refresh materials every few weeks to keep your child interested and challenged.
Can I use other liquids besides water?
You can, but start with water first — it’s the safest and easiest to clean. As your child gains skill, you can experiment with thicker liquids like juice or milk during mealtime preparation.
What if my child loses interest?
That’s completely normal. Step back and reintroduce the activity later, or modify it slightly to rekindle curiosity.
How do I make cleanup easier?
Use a tray with raised edges and place a towel underneath. Encourage your child to wipe spills independently — it’s part of the learning process.
Conclusion
Setting up a Montessori water pouring station is a simple act with lifelong benefits. It teaches focus, patience, and responsibility — all through play and exploration.
When you design your child’s environment with care, using thoughtfully crafted pieces like those from Dannico Woodworks, you’re not just decorating a space — you’re nurturing a mindset of independence and confidence.
So, what small step will you take today to help your child grow more independent tomorrow?
