
Children learn best through hands-on discovery — exploring textures, colors, and light in ways that spark their natural curiosity.
One of the most effective tools for this kind of sensory play is the Montessori light table — a beautiful blend of play, learning, and creativity.
A light table invites children to explore the world differently. From tracing shapes and sorting translucent materials to experimenting with color mixing, it turns everyday objects into opportunities for discovery and exploration.
For parents and educators who embrace the Montessori approach, it’s a must-have for nurturing independence and sensory development.
In this post, we’ll guide you through building a Montessori light table for sensory exploration, using safe and affordable materials.
You’ll also learn why it’s such a powerful learning tool — and how it perfectly complements other Montessori-inspired furniture, like the Montessori Bookshelf from Dannico Woodworks.
The Montessori method emphasizes hands-on learning and self-directed activity, and a light table is a perfect embodiment of these principles.
It serves as an interactive platform where children can explore colors, shapes, and patterns through illuminated materials, enhancing their sensory and cognitive experiences.
Not to mention, it's a wonderful way to engage multiple senses simultaneously, enriching the learning process.
Essential Materials
Before we dive into the building process, let's gather the necessary materials. Building a light table doesn't require extensive tools or expertise in woodworking, making it an accessible project for many.
- Translucent Plexiglass or Acrylic Sheet: This will form the surface of your light table. Opt for a frosted variant to diffuse light evenly.
- LED Strip Lights: Choose energy-efficient LED lights, preferably with adjustable brightness. They're safe, long-lasting, and come in a range of colors.
- Wooden Frame: You can use pine, birch, or any other sturdy wood to construct the frame of the table.
- Power Supply and Dimmer Switch: These components allow you to control the light intensity, making the table versatile for different activities.
- Screws and Wood Glue: Essential for assembling the frame securely.
- Sandpaper or Sander: For smoothing the wood surface and edges to ensure child safety.
Building the Frame
 Step 1: Measure and Cut the Wood
Start by deciding the dimensions of your light table. A common size for home use is around 24"x36", but you can adjust this based on your space and needs.
Once you've settled on the dimensions, measure and cut the wood pieces for the frame and legs. Typically, you'll need four pieces for the sides and four more for the legs.
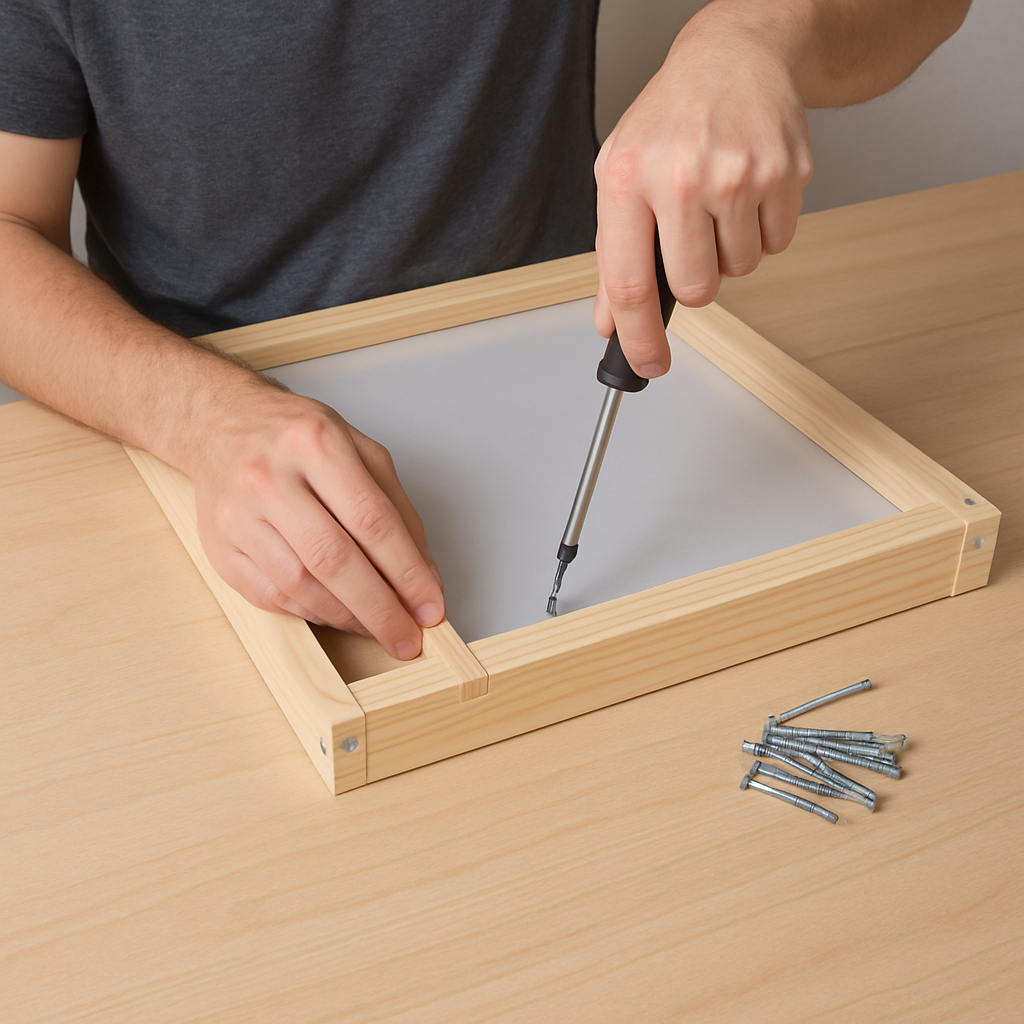
Step 2: Assemble the Frame
Using screws and wood glue, assemble the rectangular frame. Make sure the corners are square and the joints are secure. This frame will support the Plexiglass top, so ensure it's sturdy.
Step 3: Attach the Legs
Secure the legs to each corner of the frame. The height can be adjusted according to the age group using the light table—typically, about 18-24 inches high is comfortable for young children.
Installing the Lighting
Step 4: Affix the LED Strips
Inside the frame, attach the LED strip lights. A zig-zag pattern ensures even lighting across the entire surface. Make sure the strips are firmly secured and that the power supply can reach an outlet easily.
Step 5: Connect the Dimmer
Wire the dimmer switch to the LED strips according to the manufacturer's instructions. This feature allows you to adjust the brightness, which is particularly useful for different sensory activities and times of day.
Step 6: Secure the Plexiglass
Place the frosted Plexiglass on top of the frame. It should sit snugly within the frame's lip. Use screws or clips to hold it in place, ensuring it's secure but also removable if needed for maintenance.
Step 7: Sand and Finish
Use sandpaper to smooth any rough edges on the wood. Applying a non-toxic finish can protect the wood and make cleaning easier, but this step is optional.
Engaging Activities for the Light Table
A light table can be used for a variety of Montessori-inspired activities:
- Color Mixing: Use colored transparent sheets to teach children about primary and secondary colors.
- Sensory Play: Incorporate natural materials like sand or leaves to explore textures and patterns.
- Artistic Exploration: Encourage creativity with translucent paints or dry-erase markers on the Plexiglass surface.
- Mathematics and Literacy: Use letters and numbers cut from transparent paper to enhance learning in a fun, interactive way.
Safety Considerations
While constructing and using your light table, keep safety at the forefront:
- Ensure all electrical components are properly insulated and out of reach of children.
- Regularly check the stability of the table and the security of the Plexiglass.
- Use non-toxic materials and finishes to prevent any potential harm.
Safety Tips for Your DIY Light Table
-
Choose LEDs over bulbs: They stay cool and are energy-efficient.
-
Avoid cords within reach: Secure all wiring outside your child’s play zone.
-
Use non-toxic finishes: Always prioritize safety over aesthetics.
-
Check for stability: Your light table should be sturdy enough to withstand leaning and play.
At Dannico Woodworks, every design we create follows these principles — safe, stable, and thoughtfully crafted for young learners.
If DIY projects aren’t your thing, we offer expertly made Montessori-inspired furniture built with care and precision — perfect for families who value design and durability.
Frequently Asked Questions (FAQs)
What is the ideal age for using a Montessori light table?
Children as young as 18 months can begin exploring light tables under supervision. Older kids (3–6 years) enjoy more complex sensory, art, and science activities.
Can I use a regular glass top instead of acrylic?
It’s best to avoid glass. Acrylic is lighter, safer, and shatter-resistant — ideal for kids’ furniture.
How bright should the light be?
Soft, diffused light works best. Aim for brightness that highlights objects without being harsh or distracting.
Can I buy a pre-made Montessori light table instead?
Absolutely. If you’d rather skip the tools and start exploring right away, consider commissioning a custom design from Dannico Woodworks, where safety and craftsmanship come first.
The Montessori Difference at Dannico Woodworks
At Dannico Woodworks, we believe children’s furniture should do more than look good — it should grow with them, inspire creativity, and support their independence.
Our Montessori Bookshelf Collection and other handcrafted pieces follow the same philosophy as your DIY light table — built around exploration, accessibility, and child-led learning. Every design is made from premium, non-toxic materials to ensure both beauty and safety.
If you’re a parent or educator passionate about Montessori learning, we’re here to help you create an environment where children can explore, learn, and thrive — one handcrafted piece at a time.
Conclusion
Building a Montessori light table isn’t just a fun project — it’s an investment in your child’s sensory and creative growth.
With the right materials and thoughtful design, you can create a safe, beautiful space that encourages exploration every single day.
Have you tried building your own Montessori-inspired furniture at home? What activity do your kids love most on their light table?
Share your thoughts — we’d love to hear how your little ones explore the world through light and play.
Looking for durable, handcrafted Montessori furniture to complement your child’s learning space?
Visit Dannico Woodworks today to explore our collection of thoughtfully designed pieces made with care, safety, and imagination in mind.
